


introduction:
Hashnode is a blogging platform for technical writers to write and publish articles on various topics. The platform also provides an API endpoint for developers to fetch their blog post data and use it as they please.
Note: the Hashnode API can be used without a token authentication, but it also provides a personal access token for more mutations and queries.
By the end of this article, we will cover:
How to use the Hashnode API endpoint
Destructuring and rendering the data from the endpoint
Prerequisites:
To fully understand this article, you should be familiar with the following tools:
GraphQL
JavaScript
ReactJS
Asynchronous functions
Additionally, you should have a Hashnode account.
How to use the Hashnode API
Hashnode provides an endpoint, which also serves as a playground, to test and give an instant result of how our data is displayed on the server. The link api.hashnode.com serves as the endpoint and the playground.
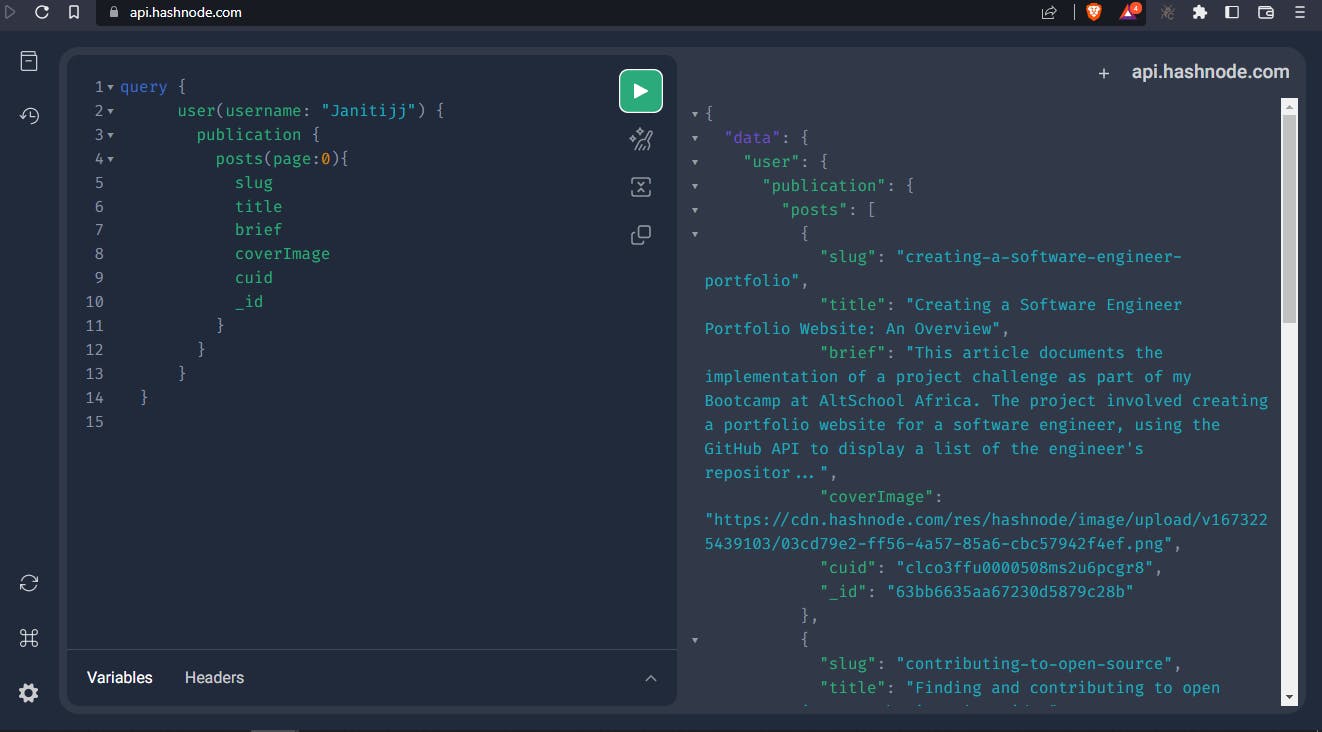
in fig:1 above
We query with a simple GraphQL syntax, passing in our username from Hashnode, to display the user's data and see in real time how our data appears on the server.
Using the data displayed from the API, we can then head over to our application and make a call to the endpoint, specifying the query in our call. We are using ReactJS in this example.
In my blog component, this is where the magic happens:
import React from "react";
import "./Blog.scss";
import { useState, useEffect } from "react";
const Blog = () => {
const [posts, setPosts] = useState([]);
const query = `
query {
user(username: "Janitijj") {
publication {
posts(page:0){
slug
title
brief
coverImage
cuid
_id
}
}
}
}
`; //as used in the playground
useEffect(() => {
fetchPosts();
}, []); //we are maintaining side effects here. since we are making an API call in react
const fetchPosts = async () => {
const response = await fetch("https://api.hashnode.com", {
method: "POST",
headers: {
"Content-type": "application/json",
// "Authorization": "Bearer {API-kEY}", if you're using token
},
body: JSON.stringify({ query }),
});
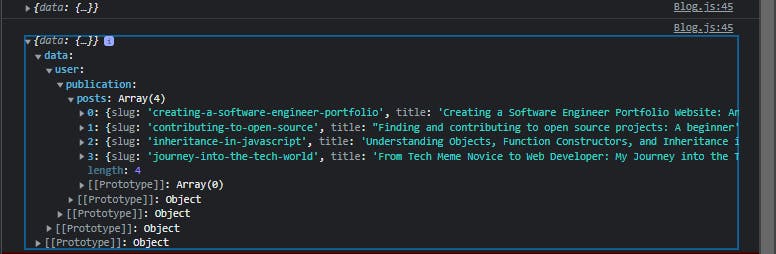
const data = await response.json();
console.log(data);
setPosts(data.data.user.publication.posts);
// console.log(data.data.user.publication.posts);
};
};
export default Blog;
In the code snippet above, we are first saving our GraphQL query to a variable called query We then use the useEffect hook to call the fetchPosts function, which is responsible for making the API call to the Hashnode endpoint.
In this function, we use the fetch method to make a POST request to the endpoint, passing in our query and setting the appropriate headers. We then consume the data returned by the endpoint and set it to our component's state using the setPosts function.
Additionally, I included a comment to show where an authentication token would be added if we wanted to access more data from the endpoint that requires authentication. The data displayed below in the console is what we get without the token.
which is pretty much what we need for this tutorial.
we have what we need, moving on to the next step
destructing and rendering the data we get from the endpoint:
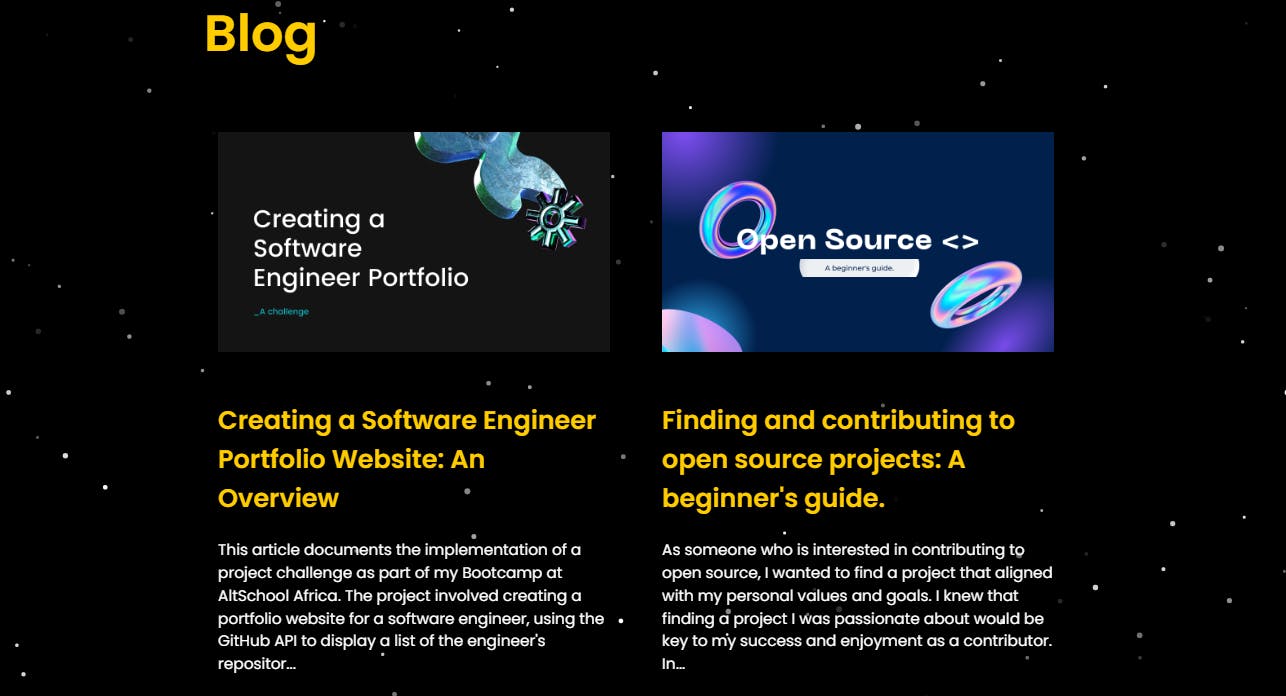
Once the data is fetched, we can then proceed to destructuring and display the data in our application. In the example below, we use the map function to loop through the posts data and extract the properties we need to display on the page. We use JSX to create the appropriate HTML elements to display the data.
 return (
        <div className="blog">
            <h1 className="blog-header">Blog</h1>
            <div className="blog-posts">
                {posts.map((post) => (
                    <div className="blog-post">
                        <img className="cover-image" src={post.coverImage} alt={post.title} />
                        <h2>{post.title}</h2>
                        <p>{post.brief}</p>
                        <a href={`https://zainab-tijani.hashnode.dev//${post.slug}`} target="_blank" rel="noreferrer">Read More</a>
                    </div>
                ))}
            </div>
        </div>
);
furthermore, we map through the posts data and destructure it with the appropriate elements such as the <img> tag for the coverImage, <h2> tag for the title and so on.
the result we get from this rendering can be seen below
and the full link to the website can be found here, by scrolling down to the blog page
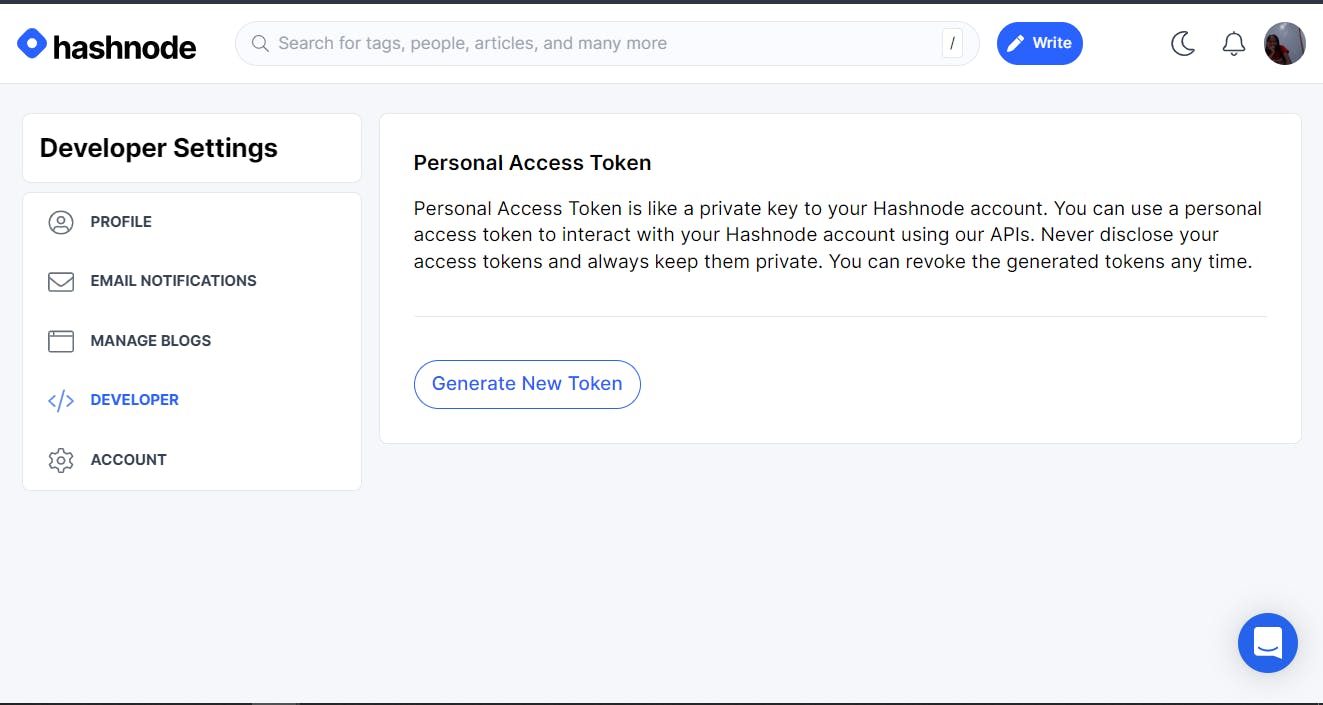
If you want to further explore the API, you can use the personal access token that is provided by Hashnode. This token can be accessed on your Hashnode developer settings account by clicking on the "generate new token" button. With this token, you can create, edit, and delete articles, as well as retrieve replies to your articles and create, read, edit, and delete replies.
displayed in fig.3 below, and you can also revoke the token anytime.
in conclusion:
In this article, we covered how to use the Hashnode API endpoint to fetch blog post data and display it in a React application. We also discussed how to destructure the data and display it on the page. The Hashnode API provides a lot of functionality, and with the personal access token, you can do even more. like
Create, edit and delete articles
Get the replies from your articles
Create, read, edit and delete replies
This is just the tip of the iceberg when it comes to using the Hashnode API. I hope this article helped you understand how to use the Hashnode API endpoint and how to display the data in your application. Happy coding!